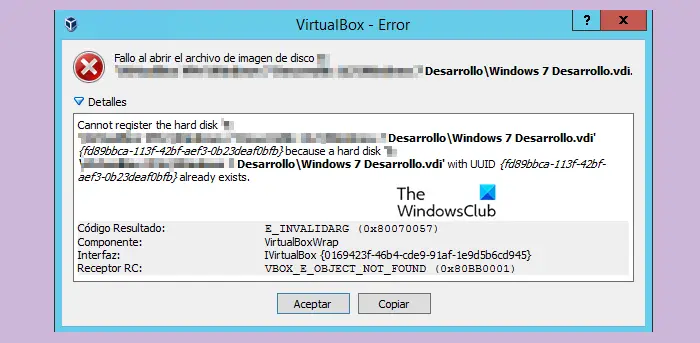
When trying to open a disk image on VirtualBox, you may get an error that implies that the Hard Disk can not be registered. The following error occurs in VirtualBox when the VM Disk Image File you are trying to open has a duplicate UUID with another Virtual Disk Image file. In this post, we will see what can do if you get VBOX_E_OBJECT_NOT_FOUND (0x80bb0001) VirtualBox error.
Cannot register the hard disk ‘File-Location\Name.vdi’ {%Virtual-Disk-UUID%} because a hard disk ‘File-Location\Name.vdi’ with UUID {%Virtual-Disk-UUID%} already exists.
Result Code: E_INVALIDARG (0x80070057)
Component: VirtualBoxWrap
Interface: IVirtualBox {fafa4e17-1ee2-4905-a10e-fe7c18bf5554}
Callee RC: VBOX_E_OBJECT_NOT_FOUND (0x80BB0001)”

Fix VBOX_E_OBJECT_NOT_FOUND (0x80bb0001) VirtualBox error
If you’re facing the “Vbox_e_Object_Not_Found (0x80bb0001)” error in VirtualBox, try the following solutions to resolve it:
- Remove Mised Virtual disks from VirtualBox
- Clone Disk image with Virtual Media Manager
- Change the Virtual Disk’s UUID
Let’s get started.
1] Remove Missed Virtual Disks from VirtualBox

First and foremost, we are going to remove the faulty Virtual Disks from the Virtual Box because the error often indicates that VirtualBox is unable to locate a specific Virtual Disk. By removing any missed or improperly configured Virtual Disks, we can ensure that VirtualBox can properly manage its resources and configuration, potentially resolving the error. Here’s how to remove any missed or improperly configured Virtual Disks:
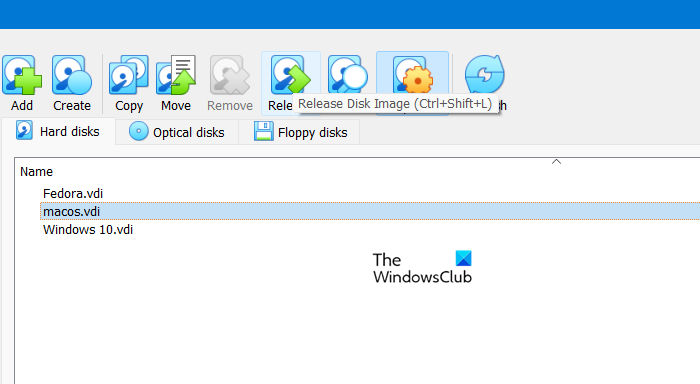
- Launch the Virtual Media Manager from the VirtualBox File menu.
- Identify and select the Virtual Disk marked that has the issue, then select the Release option when prompted.
- Now, click the Remove option to remove the Virtual Disk, and close the Virtual Media Manager.
- Next, right-click on the problematic Virtual Machine, and select the Settings option to navigate to the Virtual Machine settings.
- Click on the Storage option from the left pane, and click on the Add Hard Disk Icon on the right side to add a new Virtual Hard Drive file (.VDI).
- Click on Choose existing disk, then select the Virtual HardDisk file that needs to be added, and then select the Open button to confirm the request.
- Once the file is selected, click the OK button to close the Virtual Machine settings and then restart the Virtual Machine to apply the changes.
Hopefully, this will do the trick for you.
2] Clone Disk image with Virtual Media Manager

Cloning the disk image in Virtual Media Manager is recommended to ensure data integrity, as it rebuilds corrupted metadata and refreshes configuration. It helps isolate problems related to the disk image and determine if the error is with VirtualBox or system configuration. To clone the disk image, follow the steps below:
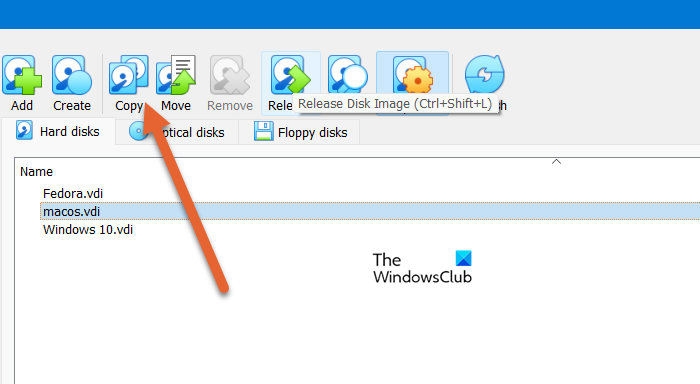
- Launch VirtualBox, navigate to the File Menu, and from there, select Virtual Media Manager.
- Once there, select the Virtual Hard Disk that needs to be cloned, and then hit the Copy button. We can specify the Disk Image File Type, name, and Size according to our preference and stick with the default settings.
- Hit the Copy button, and wait for the process to complete as the time depends on the size of the disk image.
Once done, use the newly created disk image to set up a new virtual machine within VirtualBox.
3] Change the Virtual Disk UUID

Lastly, we are going to change the Virtual Disk UUID as this ensures that VirtualBox can correctly identify and locate the Virtual Disk object, and fix any corruption or misconfiguration issues.
- Properly close the VirtualBox, and open the Command Prompt with administrative privileges by typing cmd or command prompt in the Search box, right-clicking on the first result, and then selecting Run as administrator option.
- Now, copy and paste the following command and then hit the Enter button:
cd C:\Program Files\Oracle\VirtualBox - After the previous command, follow it by copying and pasting the command and hitting the Enter button:
vboxmanage internalcommands sethduuid "%Full_VHD_File_Location%"
Note: The path of the VHD File will vary according to the users’ actual path. Suppose the virtual disk image file names “Windows 11.VDI” is located at “C:\Users\yusuf\VirtualBox VMs\Windows 11”, then the command would be vboxmanage internalcommands sethduuid “C:\Users\yusuf\VirtualBox VMs\Windows 11\Windows 11.VDI”
- If the process completes successfully, you’ll receive confirmation that the UUID has been changed.
Close the Command Prompt Window, and attach the Virtual HardDisk to a new virtual machine.
Read: Fix VirtualBox Installer Installation failed error
Why does VirtualBox not open a hard disk file?
VirtualBox can encounter difficulties opening hard disk files due to various factors such as file corruption, incompatible formats, or insufficient permissions on the disk file. Another reason could be incorrect settings or configuration within VirtualBox or other running software conflicting with VirtualBox’s ability to open the disk files.
Read: How to install macOS in VirtualBox on Windows?
How to fix the ‘Cannot register virtual hard disk’ error in VirtualBox?
If you encounter the Cannot register Virtual Hard Disk error in VirtualBox, first and foremost, check the Disk File integrity, and verify the file format, ensuring that the hard disk file is in a supported format. Removing the unregistered Virtual Hard Disk from the Vortual Machine Configuration, and then re-adding it can also be one of the troubleshooting solutions.
Leave a Reply