This article shows how to use Storage Spaces on Windows 11/10. With Storage Spaces, physical disks can be grouped into Pools, and these pools are then carved up into Spaces, which are formatted with a regular file system and are used day-to-day just like regular disks. These disks can be connected either through USB, SATA, or SAS. This feature brings the safety of RAID and allows expanding space to store files – all at a lower cost.

The feature provides two basic services:
- Data redundancy: Makes sure there are at least two copies of data, each living on a different disk, helping to prevent any accidental data loss in case there is a hard disk failure. For example, you can save files to two or more drives so that your file remains safe even if the drive fails.
- Single pool of storage: Helps you pool different physical drives together into one logical drive. In short, organizes physical disks into storage pools, which can be easily expanded by simply adding disks but handled as a single entity.
Set up Storage Spaces in Windows 11/10
Storage Spaces are the part of a Storage Pool. Therefore, to create Storage Spaces on Windows, first, you need to create a Storage Pool. Do note that the hard drive you use to create a Storage Pool should not contain data because this action will erase all the data on your hard drive. Therefore, backup your data before connecting a hard drive to create a Storage Pool.
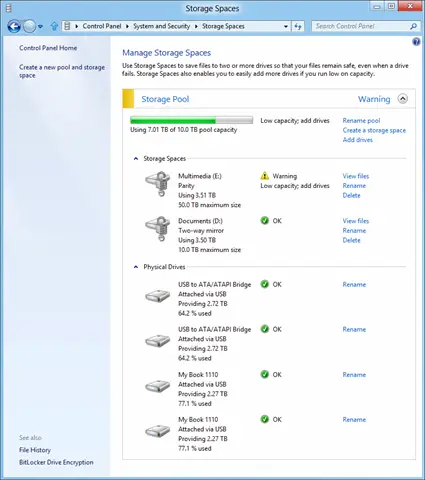
To create a pool and a mirrored space, go to the ‘Control Panel’ and next, click on ‘Storage Spaces’.

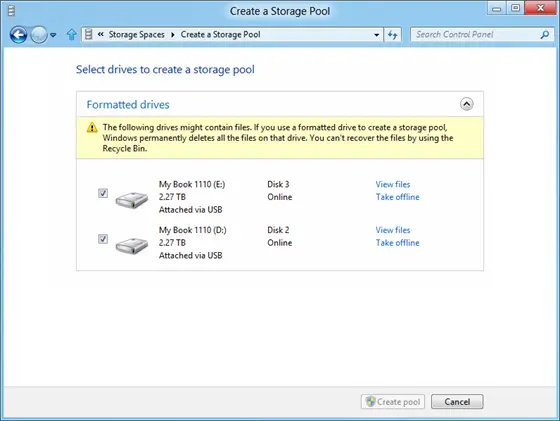
When a window shows up, select the ‘Create a new pool and storage space’ option. Next, select the drives to create a storage pool. Remember, if the selected drives contain files you will lose them all and won’t be able to recover them from Recycle Bin.
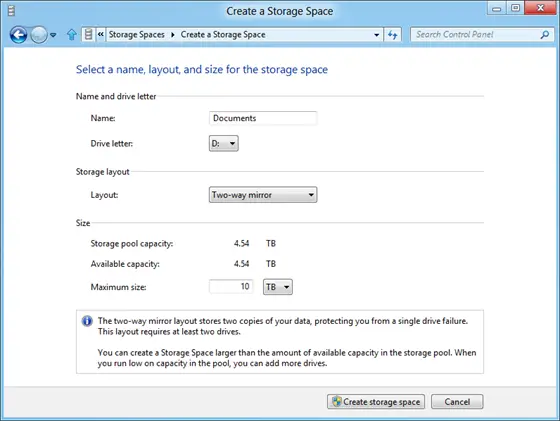
Next, select a name, layout, and size for the storage space.
To add more disks to the current pool, simply select the drives to be added and hit the ‘Add drives’ option.

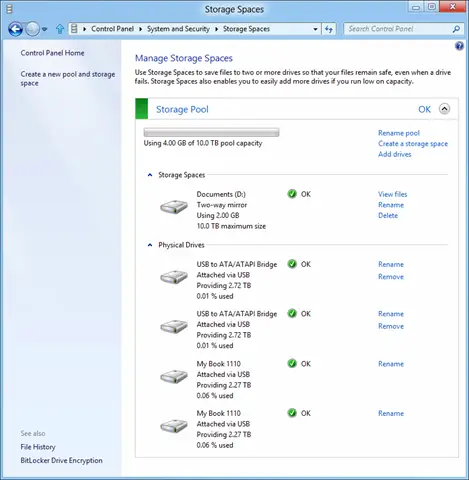
Shortly after that, you will observe the process of creating a pool in progress. Here, you can rename the pool if you would like to.
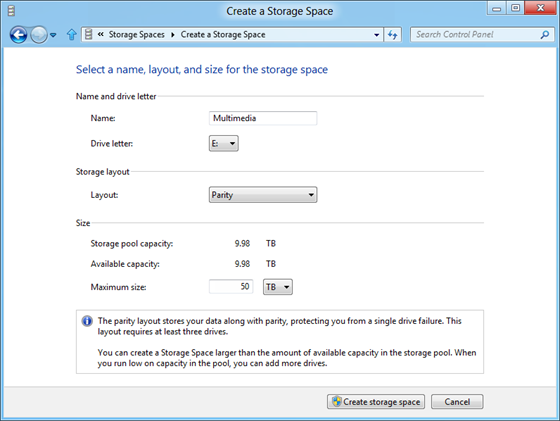
To create additional parity space, click ‘Create a shortage space and then choose ‘Parity’ from the layout options.
While creating a storage pool, if you run out of capacity you will see a notification like this:
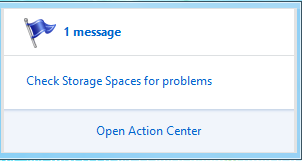
If such a case, click on the notification to get some information and try to fix it.
That’s all you need to do to create storage Spaces and start using it like any other disk!
When you add new drives to an existing pool, it’s a good idea to optimize drive usage. This will move some of your data to the newly added drive to make the best use of the pool’s capacity. It’ll happen by default when you add a new drive to an upgraded pool in Windows —you’ll see a check box for Optimize to spread existing data across all drives selected when you add the drive. However, if you cleared that check box or added drives before upgrading a pool, you’ll need to manually optimize drive usage. To do so, type Storage Spaces in the search box on the taskbar, select Storage Spaces from the list of search results, and then select Optimize drive usage.
That’s it. I hope this helps.
Posts to help you:
- Create and Manage Storage Spaces from Settings in Windows 11
- Upgrade Storage Pool for Storage Spaces in Windows 11
- Optimize Drive Usage in Storage Pool for Storage Spaces in Windows 11
- Delete a Storage Space from Storage Pool in Windows 11
- Remove Drive from Storage Pool for Storage Spaces in Windows 11
Does Windows 11 have storage space?
Yes, Windows 11 has the option to create Storage Spaces. You can create multiple Storage Spaces in a Storage Pool in Windows 11. To create a Storage Pool, open Windows 11 Settings and go to System > Storage > Storage Spaces. Now, connect an external hard drive to your computer to create a Storage Pool. Now, click on the Add button to create a Storage Pool. Once, you create a Storage Pool, you can add Storage Spaces to that Storage Pool.
How to free up space in C drive?
With time, temporary files take up space on the C drive. This impacts the performance of a system. To free up space on the C drive, delete the temporary files. Open the Run command box, type %temp%, and click OK. This will open the Temp folder. Now, delete all the files it contains. Additionally, you can run the Disk Cleanup utility to free up space on your C drive.

Leave a Reply