
Live Captions is a useful Windows 11 feature that displays spoken audio as on-screen text. However, the setup process can sometimes get stuck while downloading the required speech files, preventing the feature from turning on. In this post, we will see what you can do if setting up Live Captions is stuck.
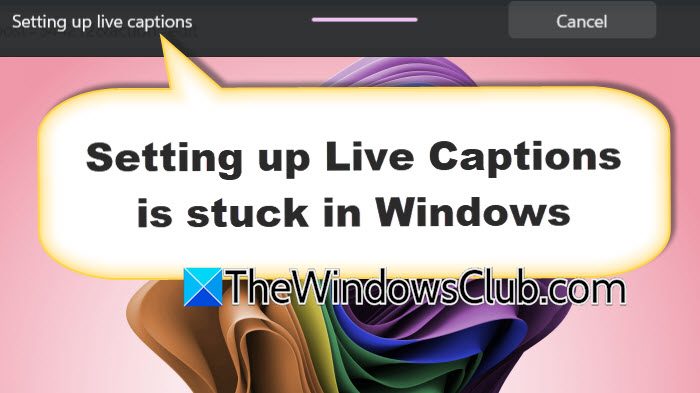
How do I set up Live Captions on Windows 11?
Users can set up Live Captions by pressing Win+Ctrl+L or by going to Settings and clicking Accessibility. There, click on Captions and toggle on Live Captions. On first use, Windows will download the required speech recognition files to enable on-device captioning.
Setting up Live Captions is stuck in Windows 11 [Fix]
If you can’t set up Live Captions and it is stuck, try the solutions below.
- Check whether the Speech pack is stuck in the Microsoft Store
- Ensure that the Microsoft Store can download apps
- Reinstall the Speech feature via Language & region settings
- Reset the cached speech data
- Use the manual MSIX package
Let us get started.
1] Check whether the Speech pack is stuck in the Microsoft Store
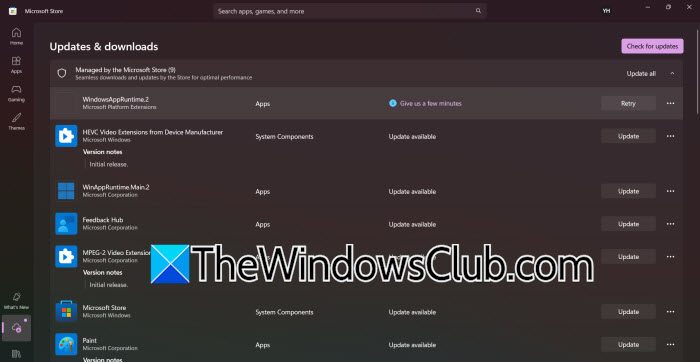
Live Captions needs language files for on-device speech recognition before it can start working. The Live Captions setup screen may remain stuck if the Speech Pack download becomes stuck, remains incomplete, or fails in the background. So, before diving into hardcore troubleshooting, check the Microsoft Store to see whether the required package is waiting to download or has encountered an error. Follow the steps mentioned below to do the same.
- Open Microsoft Store and select Downloads or Library.
- Look for a pending, paused, or failed Speech Pack or language-related download, and select Resume if the download is paused.
- Cancel and restart the download if it appears to be permanently stuck, and wait for the package to finish installing.
Once done, reboot the device and press Win+Ctrl+L to open Live Captions and check whether the setup completes. If the setup screen refuses to move forward, see the next solution.
2] Ensure that Microsoft Store can download apps
Store connectivity or download issues can prevent Windows from getting the required files, which can cause the setup to get stuck. We will test whether the Microsoft Store can download an app to confirm whether the issue is related to package access rather than Live Captions itself. To do so, open Microsoft Store, sign in with the Microsoft account if you are not already signed in, and search for any free app. Try downloading it; if the download doesn’t start or fails, open Library and select Get Updates. Let the Microsoft Store update, then reopen it.
Try downloading the app again. If it fails, we’ll fix the Store first by running the Store app Troubleshooter or resetting the Store via wsreset.exe. Now, try once again, and if it works this time, press Windows + Ctrl + L to turn on Live Captions. If it is still stuck even after the Microsoft Store downloads work properly, proceed to the next solution.
3] Reinstall the Speech feature via Language & region settings
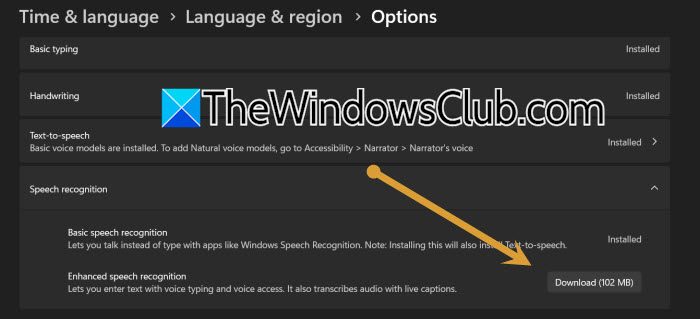
There can be an incomplete or damaged speech recognition component due to an incomplete installation, stalling the app from working properly. Removing and downloading the existing speech feature gives Windows a fresh copy of the required files. Here’s how to install speech and enhanced speech recognition features through the Language and region settings.
- Click Win + I to open Settings, go to Time and language, and select Language and region.
- Under Preferred languages, find the Windows display language and select the three dots next to the language.
- Choose Language options, scroll down to the Language features section, and locate Speech, Basic speech recognition, or Enhanced speech recognition.
- Remove or uninstall the existing speech feature, then reboot the device, and return to Settings > Time and Language > Language and regions > Language options.
- Download and install the available speech recognition feature again and restart the PC once the installation is complete.
Open Live Captions and check whether it can now complete setup. If the issue persists, move to the next solution.
4] Reset the cached speech data
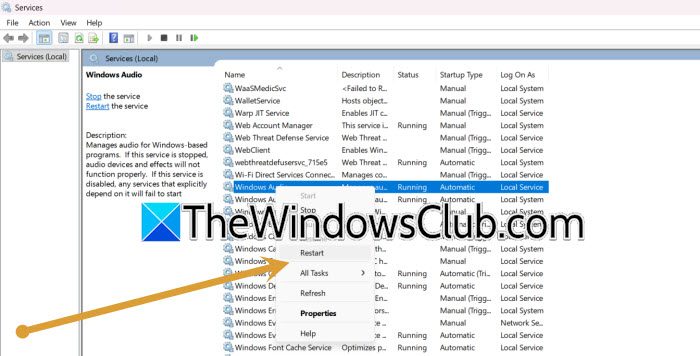
A damaged or incomplete copy of previously downloaded speech data can cause Windows to repeatedly use the same problematic files during setup. To fix this, we are going to reset the cached data to force Windows to stop relying on that existing copy. This allows the speech components to be downloaded or recreated again.
- Click Win + R to open the Run dialog box, type services.msc and hit Enter.
- In the Services window, locate Windows Audio, right-click on it, and select Restart. Do the same for Windows Audio Endpoint Builder.
- Close the Services window, open File Explorer, and in the address bar, paste the following path and press Enter:
C:\ProgramData\Microsoft\ - Locate the Speech folder, right-click on it, select Rename, and change its name to Speech.old.
Note: Do not delete it, and keep it as a backup in case there’s a need to revert it.
Restart the PC, and try setting up Live Captions again. If the issue remains, go to the next solution.
Read: How to Enable and Customize Live Captions on Windows 11
5] Use the manual MSIX package
Microsoft provides standalone MSIX installers for each language and architecture as a direct bypass. It bypasses the failed automatic download and installs the language package directly, and helps Live Captions to work properly.
- Launch Settings > Time and language > Language and regions.
- Check the Windows display language, and then go to Settings and click on System.
- Select About, go to the Device specifications section, and check the System type, such as x64 or ARM64.
- Open Microsoft’s Live Captions and Voice Access troubleshooting page and download the Store package that matches both the display language and system type.
- Open the downloaded CAB file, open the ZIP file contained inside it, and extract the files to a folder.
- Next, double-click the MSIX file to launch the installer, select the Install button, and wait for the installation to finish.
After it installs, restart the device, and Live Captions should work properly.
Read: Enable or disable Live Captions Profanity Filter in Windows 11
What is the best live caption app for PC?
The best live caption options for PC users generally include built-in Windows Live Captions and dedicated speech-to-text tools, depending on whether they need captions for system audio, meetings, videos, or accessibility. The best live caption apps besides Windows 11 Live Captions include Google Chrome Live Caption and tools like Otter.ai for meeting transcription. The best choice depends on where you need captions.
Also Read:
- How to add Live Captions and Subtitles in PowerPoint
- Enable Live Caption feature for Audio or Video on Chrome.
