In this post, we will see how to move OneNote notebooks from your Windows computer to OneDrive. A recent feature allows you to save the OneNote 2016 Notebook on OneDrive and transfer the other files.
Microsoft’s OneNote notebook is a popular program for gathering and saving information in order to make notes and may share it over the internet. In simple words, it is a digital form of a material notebook. The original version of OneNote is OneNote 2016 which was first released for Microsoft Office 2016. The notes related to this version are stored locally on computer devices. The most updated version currently being used is simply called OneNote and is preinstalled in Windows.
While OneNote 2016 is no longer updated with new features, it is optionally available for users using locally stored notebooks. The new, up-to-date version of OneNote is a free version with Windows and automatically syncs all the notebooks to users’ OneDrive accounts. OneNote for Windows comes included with every edition of Windows, as well as Office 365 and Microsoft Office1.
If you are still using the original OneNote 2016, there is no provision to use these notebooks with other versions of OneNote until they are stored on the local hard drive. In Order to use notebooks created using OneNote 2016 with other OneNote versions like OneNote Online, OneNote mobile apps, or OneNote for Windows 10, users need to sync existing notebooks on their local drive to their cloud-based OneDrive account.
It is also worth mentioning that syncing your notes on OneDrive offers several benefits. You can edit and read the notes across any device, share them with friends, and collaborate irrespective of location. In this article, we discuss how to sync notebooks in OneNote 2016 from your computer to a free OneDrive account.
Move OneNote notebooks to OneDrive
Go to Start in Windows, search for OneNote, and then click the app called OneNote from the search results.
Click the Show Notebooks button, and then click on More Notebooks.
In the More Notebooks window, locate the upper-left corner of the OneNote window.
Click the notebook drop-down menu and select the notebook you want to sync.

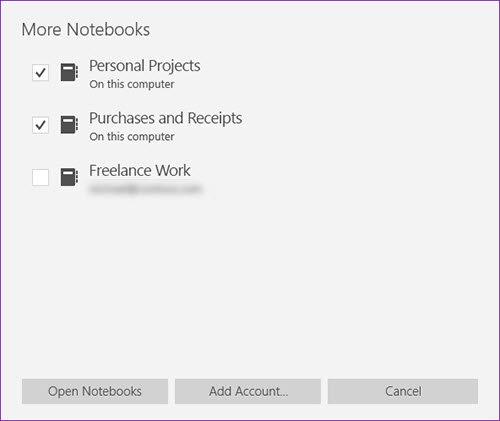
Click Open Notebooks.
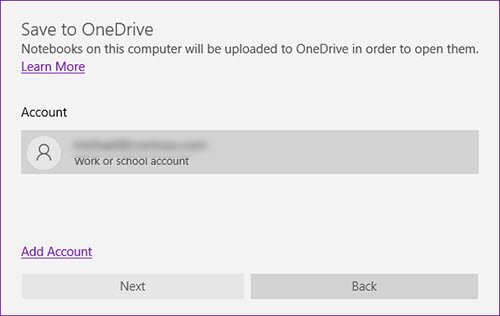
After selecting the notebooks you want to sync, a Save to OneDrive window will pop up.
Now, choose the Microsoft account you want to use to sync the notebook. You can use a free Microsoft account or an account given to you by your school, college, or work.
If you are not currently signed in to your OneDrive account through Office, Click the Sign in button from the sign-in window.
In the Add a service dialog box that appears, give your email address and click Next.
Enter your password on the Sign-in screen and click Sign in.
Once you’re signed in to your OneDrive account, You can change the notebook’s name in the name box if you wish to change it. A user can either change the notebook’s name or retain the current name.
Now click Move Notebook to move the notebook to your OneDrive account,
Once you’re done, your local OneNote notebooks will be uploaded to the OneDrive account. After the sync, you can still use the online notebooks in OneNote 2016, and everything you edit in the legacy app will be synced with the Windows OneNote app.
I hope this helps!
Read: How to make OneNote paste plain text without formatting.