
Modern video game consoles make it super easy for users to take screenshots, but the same isn’t true on PC, especially on Steam. Steam has supported screenshots for years, but strangely, many users still don’t know how to do it.
Taking screenshots in Steam is easy and doesn’t take much effort. A simple key press and the deed is done. However, once a screenshot is taken, do not expect it to show up before your eyes. It automatically saves to the Screenshots folder, so if you want to view your shots, that’s where you need to go.
How to take screenshots in Steam via Windows PC
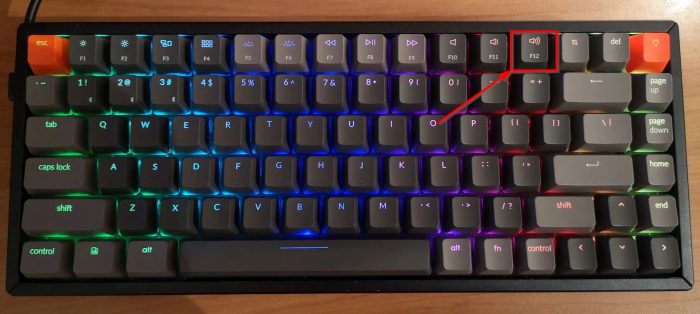
Most Steam users have a Windows computer, so we’ll start there.
- OK, so take a screenshot, you must first open the game
- From there, press the F12 key and right away the screenshot will be taken.
For some users, they might not be too pleased with using the F12 key, but worry not, this can be changed.
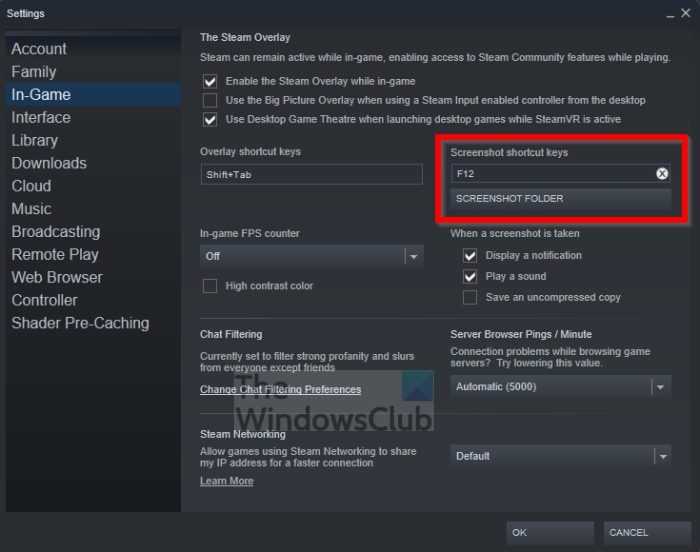
- All you have to do is click on the Steam tab.
- When the dropdown menu appears, please click on Settings.
- The Settings window should now be visible.
- Click on the In-Game section via the left panel.
- Finally, change the default F12 key to something more preferable.
There is no need to restart Steam. Just continue as you were.
How to find Steam screenshots on Windows
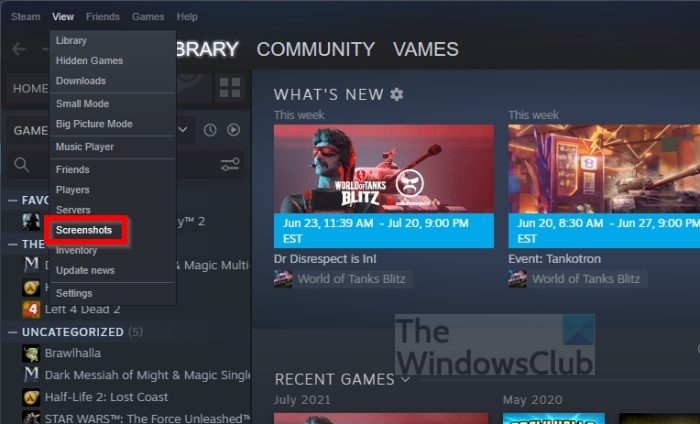
So, you want to view your masterpiece, then? That’s alright because we can make it happen for you.
- From within Steam, click the View tab.
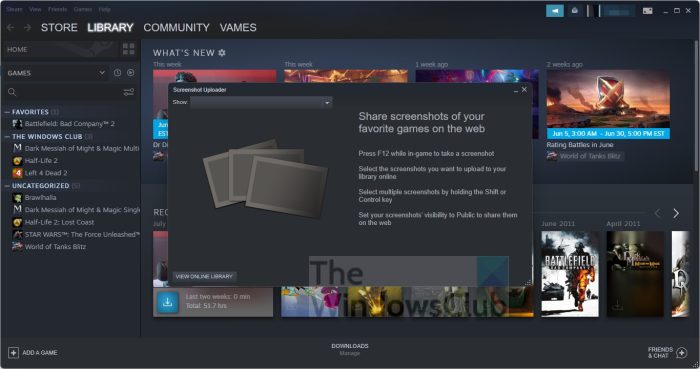
- Select the Screenshots option from the dropdown menu.
You should now see a small window with all your screenshots. You can also click on the Online Library button to view screenshots you’ve shared on the web.
How to take screenshots in Steam via macOS
When it comes down to taking Steam screenshots on macOS, it’s very similar to the Windows operating system. Just press the F12 key and that’s it. However, it’s a bit different if you own a Touch Bar featured MacBook Pro.
- Open the Steam app.
- Launch into a specific game.
- From there, press the Fn key.
- The function row should now appear in the special Touch Bar.
- Press the F12 button and that’s it.
Your screenshot is now saved to your hard drive for viewing whenever you want to.
How to view Steam screenshots on macOS
To view the screenshots you’ve taken, follow the instructions below.
- Click on the View tab in Steam.
- After you’ve done that, select Screenshots via the dropdown menu.
- A window will appear with all screenshots available.
If you want to see the screenshots you’ve shared on the web such as on social media platforms, then click on View Online Library.
How to snap Steam screenshots on Linux
For those who have gaming computers powered by Linux, you should not worry because it is possible to take Steam screenshots in Linux. The task is the same as in Windows where the user only has to press the F12 key.
As for viewing screenshots, simply follow the Windows-related steps above, and you’re good to go.
Read: Run Windows games on Steam Deck with Steam Proton
Where do screenshots go on Steam?
To see where your screenshots are, click the View tab in Steam, then select Screenshots. Please click the dropdown menu button from the newly loaded window, then select Show on Disk. The folder containing all of your screenshots should now be visible. To share your screenshots, select the screenshot you want, then click the Share button.
Are Steam screenshots automatically shared?
No, screenshots are not automatically shared, but they are automatically uploaded to the cloud for easy access in the future. You can share screenshots from the cloud area with folks on social media if needed. In Steam, screenshots you take of your games are private by default and visible only to you.
