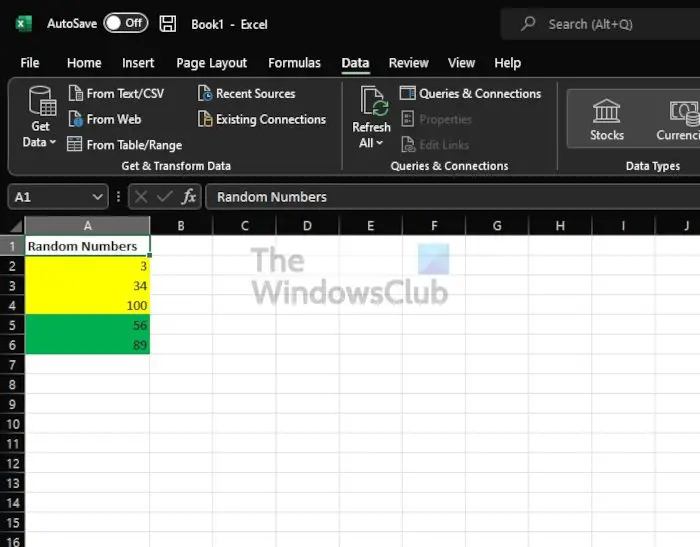
Microsoft Excel has a great sorting feature that works quite well. However, it is possible to use this feature to sort cells based on their color. Multiple colors are supported, and from our testing, we can envision many people taking full advantage of it.

A simple example of sorting colors is a situation where different colored cells are jumbled together, but you want to group cells by their color instead. So, you may choose to have red cells at the top, and green cells at the bottom.
Sorting data via cell and font colors in Microsoft Excel is much easier than one might think, and we have to thank Microsoft for not making this task a complicated mess. In fact, it is easier now than with older versions of Excel.
How to filter or sort Excel data using Cell Color

Ater adding colors to each cell within your spreadsheet, it’s now time to organize them by using the Sorting feature.
- Select one of the colored cells in the Excel spreadsheet.
- From there, click on the Data tab above the Ribbon area.
- Via the Sort & Filter section, please click on Sort.
- A small window will appear with several options to choose from.
- Go to Sort On and click the dropdown menu.
- Select the option that reads, Cell Color.
- From the Order section, please select an order type. The options are A to Z, Z to A, or custom.
- Finally, move over to Sort By and choose a Column from the list of options.
- Hit the OK button to complete the task.
As we can see, the colored cells in your Excel spreadsheet should have changed. Instead of being a mess, things should now be more organized than before, and pleasing to the eyes.
How to filter or sort Excel data by Font Color

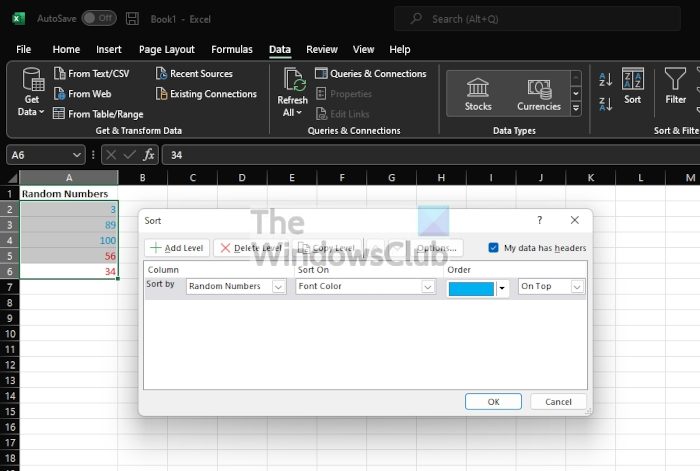
When it comes down to sorting by Font Color, the steps are more or less the same as sorting by Cell Color.
- Click on a cell to highlight it.
- Select the Data tab from above the Ribbon in your Excel spreadsheet.
- Next up, click the Sort button, and right away a window will appear.
- From the newly loaded window, navigate to Sort On and select Font Color from the dropdown menu.
- You can then use the other options to perform additional customizations
- Click the OK button to complete the task.
By looking at your spreadsheet, cells should now be organized by Font Color.
Read: How to copy values from the Status Bar in Excel
How to add colors to cells in Excel?
Adding colors to cells is very important to learn if you want to be an expert at using Microsoft Excel. If you’re unable to do it then knowing how to organize cells and fonts by colors would feel like a handicap to your overall skills.
- Open the Microsoft Excel program from your computer.
- Launch the populated spreadsheet you want to work with.
- Select a single cell from within the spreadsheet.
- Look to the Ribbon and find the Fill Color button.
- Choose your color and right away the cell will change.
- You can do the same with fonts by selecting the Font Color icon.
The changes will happen in real-time, therefore, you can tell if things are being done to specifications or not.
How do I automatically sort Excel by color?
All you have to do is click on the AutoFilter arrow located next to the column heading you want to sort, then choose Sort by Color via the dropdown menu. After that, select the color of cells you want to be on top or at the bottom of the column.
Can you sort by font color in Excel?
In a range of cells or a table column, click a cell that contains the cell color, font color, or icon that you want to filter by. in the column that contains the content that you want to filter. Under Filter, in the By color pop-up menu, select Cell Color, Font Color, or Cell Icon, and then click a color.
Why does filter by color not work in Excel?
From our understanding, there are several reasons why this is not working as it should. One of the primary reasons is the Conditional Formatting feature. If you have cells that have been pre-formatted by the use of Conditional Formatting, then chances are, you might not be able to filter by color
Leave a Reply