The PIN is a very powerful authentication medium on Windows 11 and Windows 10. It helps in faster logging in to a Windows computer. Windows 11/10 can store from a minimum of 0 to a maximum of 50 PINs. This can lead to extended security of a computer and a user cannot use the PINs used earlier to log in to a computer. In this post, we will show you how to enable or disable PIN History on Windows 11/10.

Enable or disable PIN History on Windows 11/10
There are two methods by which one can enable or disable PIN history on Windows 11/10:
- Using Registry Editor.
- Using the Group Policy Editor.
1] Using Registry Editor

Open the Registry Editor. and navigate to the following path:
HKEY_LOCAL_MACHINE\SOFTWARE\Policies\Microsoft\PassportForWork\PINComplexity
Set the Value data for History DWORD from 0 to 50. Make sure that the base value is set to be Decimal.
When you are done, just reboot your computer.
That’s it!
When you want to disable this feature, delete the History DWORD.
2] Using the Group Policy Editor

Open the Group Policy Editor and navigate to this path:
Computer Configuration\Administrative Templates\System\PIN Complexity
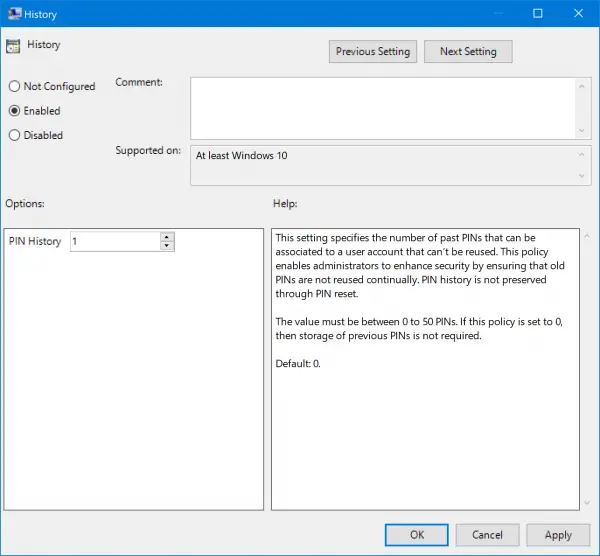
Look for History.
The description for this policy states:
This setting specifies the number of past PINs that can be associated to a user account that can’t be reused. This policy enables administrators to enhance security by ensuring that old PINs are not reused continually. PIN history is not preserved through PIN reset. The value must be between 0 to 50 PINs. If this policy is set to 0, then storage of previous PINs is not required. Default: 0.
Double-click on the entry to modify it. Select the radio button as Enabled.
For the number field for PIN History, select a value from 0 to 50.
It is worth noting that 0 is the default value for the policy.
Select Apply and then select OK.
Reboot your computer for the changes to take place.
I hope this guide helped you learn how to enable or disable PIN history on Windows 11/10.
Read: How to enable or disable Passwordless sign-in only in Windows
TIP: To stop Windows from requiring PIN changes, go to Start > Settings > Accounts > Sign-in Options. Click on PIN (Windows Hello) and choose “Remove this sign-in option.” This will prevent the system from prompting you to change your PIN. If the “Remove” option is greyed out, you may need to disable Windows Hello first.