Believe it or not, but Microsoft OneNote is an incredible note-taking tool. The ability to save notes to the cloud automatically is probably our favorite feature, and the same be said for its editing prowess.
Add a Grid and Rule line to OneNote
Editing a OneNote page is effortless, especially if you have tons of experience using Microsoft Word. That’s because the design of OneNote is not a huge departure from Word, and that is a good thing.
Now, we will talk about adding a Grid Line and a Rule Line in Microsoft OneNote for those who want to learn. Not only that, but we shall also discuss how to change the background color of a page.
Bear in mind that OneNote for Windows is slightly different from other versions; therefore, things might work a little bit differently if you’re not using a PC.In this post we will cover the following:
- How to add Rule Lines to OneNote
- How to add a Grind Line
- Change the color of your background in OneNote
Let us talk about this in more detail.
1] How to add Rule Lines to OneNote

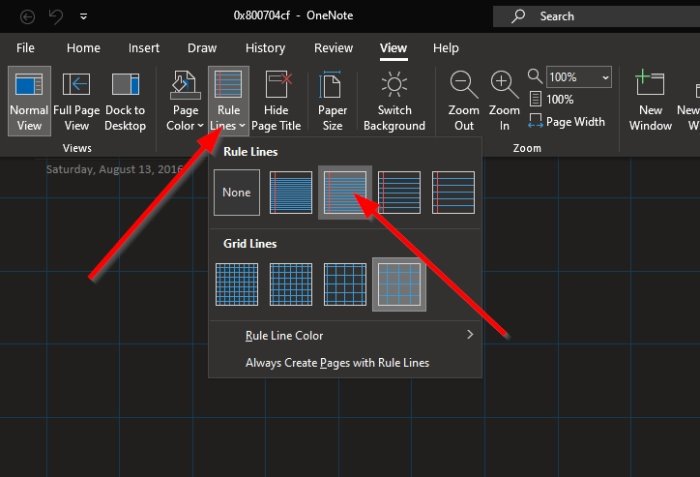
The first thing you will want to do here is launch into the OneNote program, and from there, be sure to select the View tab from the top.
Once you’ve done that, the Ribbon show appears with a bunch of options to choose from.
Simply click on Rule Lines to view the different forms of Rules Lines you can add to your page. After settling on the perfect one, select it, and right away, it will appear on the page.
2] How to add a Grind Line

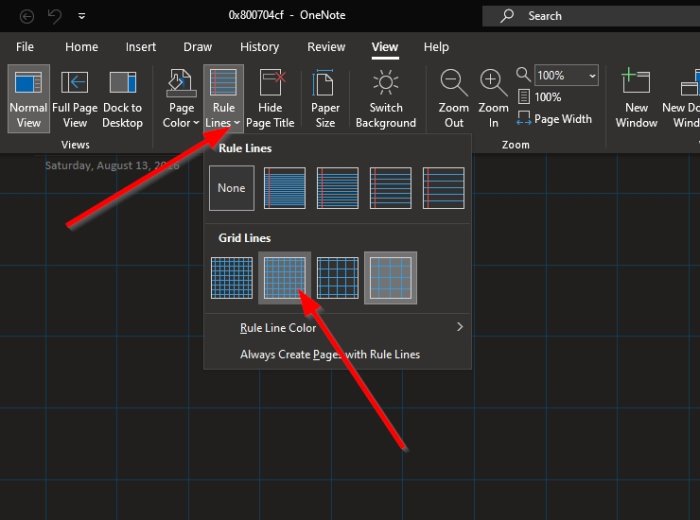
In terms of adding a Grid Line, the task is more or less the same.
Click on View > Rules Lines, then choose from the available grinds located under Grid Line, and that’s it.
3] Change the color of your background in OneNote

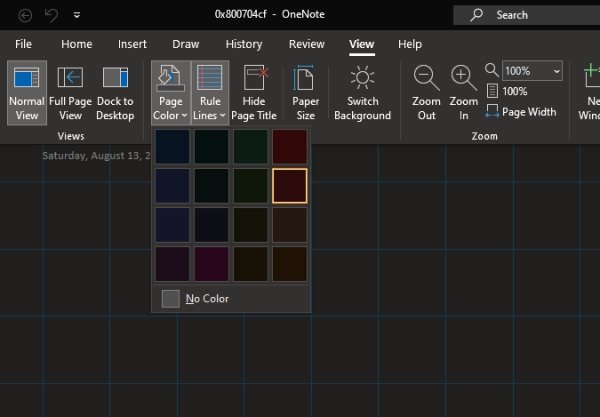
If the need arises, you can change your page color with ease.
To do this, please select the View tab once more, then be sure to click on Page Setup > Page Color. You should now see quite a few colors to choose from.
Select the one that best fits your style, and the right way your OneNote page should look much different than before.
Leave a Reply