
The way in which videos are made and shared these days has come a long way. Unless you are a professional YouTuber, high video quality like 2K or 4K can seem wasteful and a bit of overkill, since most videos are used for casual recreational and sharing purposes. If you do come across a video that is too big to share or upload, you may want to reduce its size. So today, I’ll be suggesting some hassle-free ways in which you can do so. In this article, let us take a closer look at some of the best free online video size reducer tools and free video compressor software.
What impacts a video’s size?
The two most common ways to reduce a video’s size without impacting its quality are trimming the footage or removing audio from the video. You can bring your video’s resolutions down, but that will take a toll on its quality, although tools and software try their best to make the impact as minimal as possible. The resolutions you choose largely depend on the device your video will be broadcast on. The bigger the screen of your device, say a television or a home projector, the higher the resolutions you would need. So, one should modify their videos accordingly.
Several other factors can play a role in the varied video sizes, like video codec and the bitrate. Video bitrate is the amount of data that is used by a video per second. Different videos require different bitrates to stream without losing their quality, depending on their resolution and frame rates. The video codec is used to encode a video and compress its data. Different codecs provide different compression ratios, depending on the contents of the video. For example, the H.265 codec offers a 50% better compression ratio than the H.264 codec.
Compress Video Size without losing quality free on PC
You can reduce video size without losing quality by using free video compressor software or an online tool.
Free video compressor software to reduce Video File Size without losing quality on PC
1] ShotCut
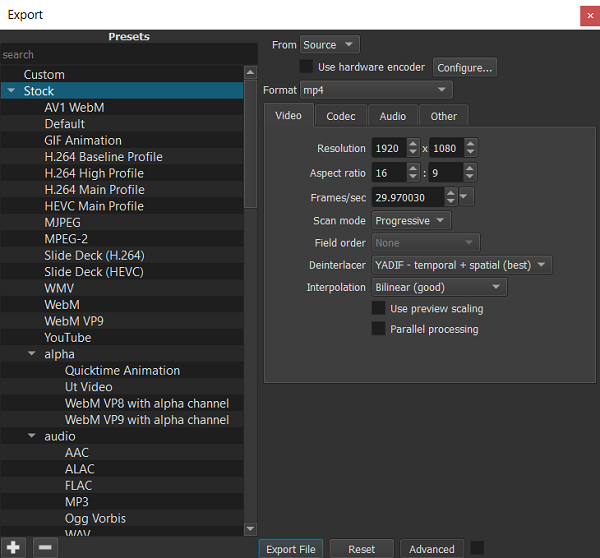
ShotCut is a full-fledged video editing tool used by people far and wide to efficiently reduce the size of their videos. In order to edit a video on ShotCut, you have to follow the steps mentioned below:
- Download & install ShotCut, open it and import a video file using the ‘Open File’ option.
- On the top-right corner, you’ll find an option by the name of ‘Export,’ clicking on which will open a plethora of options.

Using an H.264 profile is good enough to cut down on the video size without giving up too much on its quality, and it is what ShotCut itself claims to have done the job for most of its users.
- You will find options to compress your videos in the export settings. You can also play around with the resolutions and aspect ratios. However, you should make proportionate changes to your configurations unless you want a distorted video.
- Changing the output automatically modifies the attributes of the video, suppose you shift from HDV (1080p HD film at 25 fps) to HDV (720p HD film at 29 fps). Your FPS and resolution will change automatically, as will your corresponding size. However, going smaller than the preset resolution will require you to manually calculate the appropriate dimensions.
2] Simple Video Compressor for PC
Simple Video Compressor lets you reduce the size of your video files through a simple GUI. As the name suggests, the tool itself is very simple to use. It offers a minimalistic UI and easy-to-understand operations. The tool is donationware, and during installation, it may request that you install some sponsored content; however, you can skip it.
To get started, you need to add videos that you want to compress. You can add multiple videos or an entire folder. Moreover, you can import the videos using a text, CSV or an Excel file. This feature can help you out if you have already indexed the video files in a text file.
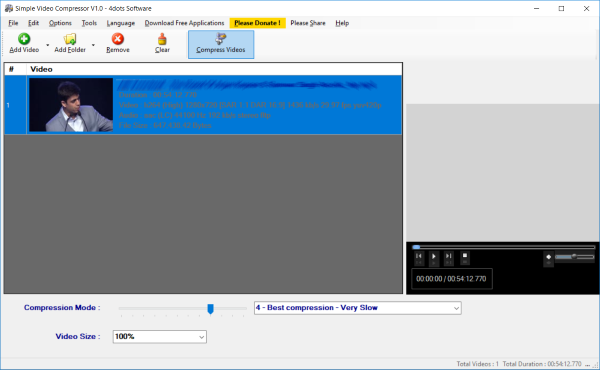
Once the videos are added, you can verify them by simply reading through the details or by using the video player on the right side. Now you can select the compression mode depending upon your requirements. The 12-level slider can be adjusted to select a combination of compression and quality. Alternatively, you can also use the drop-down to select the compression level. Remember, the higher the compression level, the lower the quality.
The ‘Video Size’ drop-down lets you resize the videos by specifying the absolute percentage. You can easily resize your videos if you wish to post them on social media or other platforms.
Once you are done adjusting the compression level, you can hit F6 or the ‘Compress Videos’ button to start compression. Compression can take longer depending on the level of compression. The progress bar gives you an idea about the total progress and the program will also display the time remaining until completion. You can pause the compression in between and resume it whenever you want.
The tool also integrates well into the right-click menu of Windows Explorer. You can simply right-click a video and select ‘Compress with Simple Video Compressor’. The compression will start for the select file.
Simple Video Compressor can also be used to join different videos into one. All you need to do is open the join files dialog and enter the path to files to be joined.
The tool offers various other customizations as well. You can manually set an output file or specify a pattern for output files. Moreover, you can also specify the output folder and an operation to perform if the file already exists.
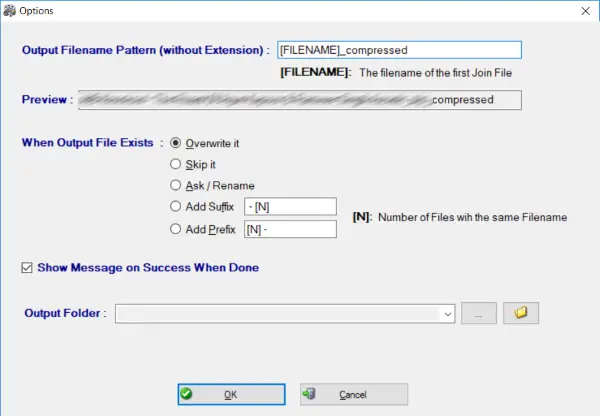
You can also choose an action to perform once the file compression has completed. The tool offers various actions like Shutdown, Sleep, Logout, Explore output file, etc.
Simple Video Compressor is a must-have if you compress a lot of videos. It does what it says and gets the job done. It is a very simple and basic tool. There are a lot of video suites available but if you are looking for something to just compress the videos, then this tool might be it.
Click here to download Simple Video Compressor. You may also want to take a look at these tools to reduce Video file size online and offline.
3] Free Video Converter to compress videos
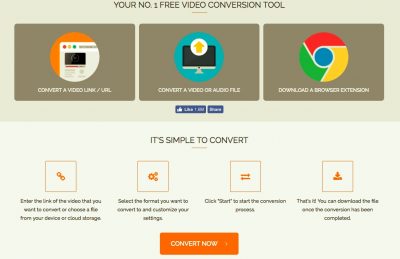
Free Video Converter is an offline video converter best known for its ability to handle batch video conversion. This tool supports an array of video formats, including MP4, AVI, MPEG, and MP3, along with a preset that is optimized for iOS devices. The only downside is that users need to pay to remove the watermarks. Otherwise, it’s a superlative option for converting and merging videos into a single file. Get it from the homepage.
4] Any Video Converter software to reduce the size
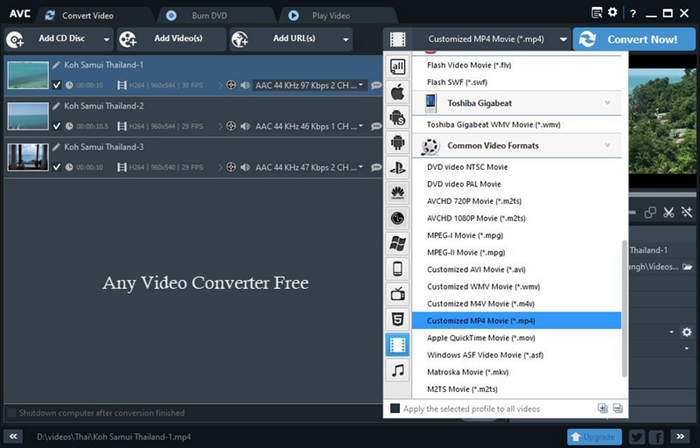
AnyVideo Converter is a comprehensive video converter that caters to your online and offline needs. It allows users to convert videos on YouTube and other popular online platforms with relative ease. AnyVideo Converter supports video conversion from Facebook, Vimeo, Metacafe, and others. It also has an option to rip audio from CDs and DVDs, just in case.
The best part is that Any Video Converter supports all the major video formats. Additionally, the tool also offers tailor-made profiles for each device. I have also noticed that the conversion process is pretty fast and yet it doesn’t consume excessive computing power.
5] Handbrake Video Converter Freeware
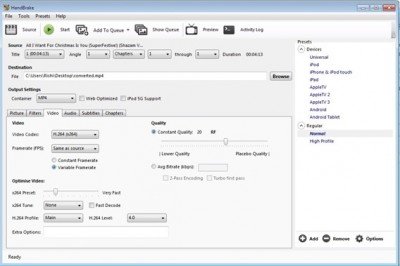
HandBrake Video converter is my personal favorite out of the lot. Handbrake earned respect for supporting the highest number of video platforms and the open source nature only made it a formidable choice. The program is intuitive, and yet it manages to offer the best set of features. Video editing options include cropping, advanced filtering, frame rate adjustments, and presets. That being said, Handbrake is relatively new to Windows (it started as a Mac-only offering) The only issue that I faced was the rather steep learning curve, but again it is worth the effort.
TIP: MP3 Quality Modifier can help you reduce MP3 file size.
Free video compressor online tool
1] VideoSmaller
Compatible with both Mac and Windows, VideoSmaller is a clean, easy-to-use video compressing tool. The first thing you’ll notice is that it first offers you to use a lower compression level on the video you upload. This would maintain the best quality but won’t reduce the size as much.
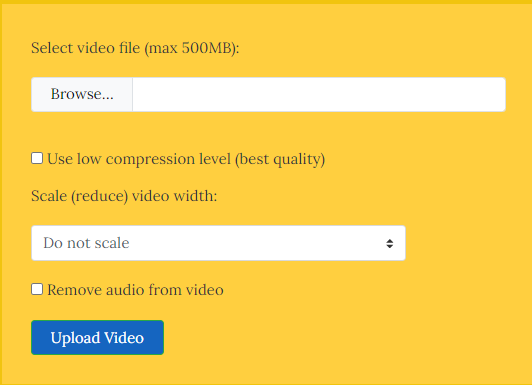
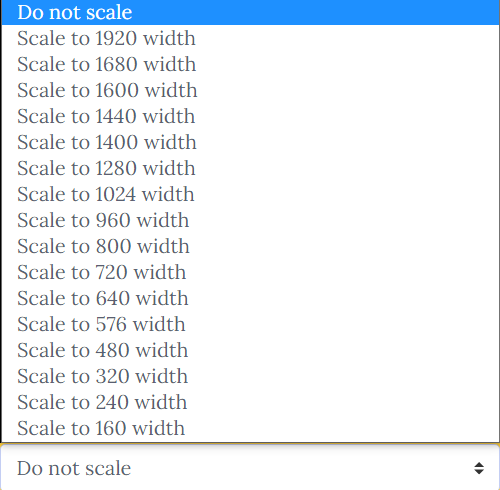
Alternatively, you can choose to scale your video. The option to do so is right below the low compression setting, in the form of a dropdown with all possible dimensions. This would impact your video quality, the significance of the impact would depend on how much you choose to scale it back, but it would reduce the file size considerably.
At the bottom is an option for you to remove any sound from the video. This, as mentioned above, has an impact on the file size. So, if your video is something that isn’t in any need of audio, you can check this setting too. In the window where you can upload your video, there is a warning that VideoSmaller can only take videos up to 500MB, but this isn’t something to be worried about, because it takes hours and hours of footage off of, say, a smartphone, to rack up 500 megabytes. VideoSmaller also claims to keep your uploaded videos off of its cloud, i.e., any video you upload will be removed from its servers a few hours after your work with it is done. Go here to use this tool.
You may experience issues, like the website being too stuffed with ads or only being able to work on one video at a time, in which case you have several alternatives like VideoSolo, YouCompress, etc.
Unlike other video conversion software, VideoSmaller is offered with clear intent. VideoSmaller mostly focuses on reducing the size of the video. Before we begin, I would like to mention that VideoSmaller is an online video compression service and doesn’t require you to install additional software. However, this also means that a high-bandwidth internet connection is necessary. VideoSmaller is completely free, and the compression algorithm is pretty spot on.
All you need to do is browse and upload the video file to the uploader menu. Then you can specify whether to use a low compression level (lowest compression possible without degrading quality). Additionally, you can also scale the video to a different width. It must be mentioned that the tool misses out on a custom video width scaling option. VideoSmaller also offers a feature that “Removes audio from video.”
2] Clipchamp online tool

Unlike other services mentioned here, Clipchamp puts a watermark on your videos. This online video conversion tool is best known for handling multiple videos (batch processing) and offering a good set of features for an online conversion tool. Summing it up this tool offers video compression tools, conversion, instant video recording on the browser, and a video editing tool. It was good to see that Clipchamp could handle 4K video conversion gracefully. To remove the watermarks, you need to pay – so that is something you should know.
Read: How to use Clipchamp video maker and editor in Windows 11
How do I reduce the MB size of a video?
To reduce a video’s MB size, you can use video compression software like HandBrake or online tools such as Clideo. Options include lowering the video resolution, reducing the bitrate, or converting it to a more efficient format like MP4.
How do I decrease the size of a video on Windows?
To decrease the size of a video on Windows, use a video compression tool like HandBrake. Install the software, open your video file, and adjust settings such as resolution, bitrate, or format to reduce size. Finally Export the compressed file.
