The Windows Start Menu has been our go-to point for accessing most of our computer applications. Over the years, with different versions of the Windows operating system, Microsoft has been refreshing its design and updating how it works. Yes, from size to structure to function, this Start Menu kept on transforming – both in terms of looks and in terms of functions. If you want to change the default look of your Windows Start Menu, this blog could interest you.
With the default Windows settings, the Windows 11/10 Start Menu displays icons on the left side and the application tiles on the right side. It also allows for displaying Live tiles, which present updated real-time information like the Weather application. The username appears at the top,p and the power button, along with Settings, Pictures, and Documents, appear in the bottom left corner of the menu. Overall, the Windows Start Menu is clean and organized.
However, unlike older versions of Windows, this version does not show color; instead picks up an accent color from the desktop background – Hence, the Start Menu always wears a dark theme.
Add custom color theme to Windows 11/10 Start Menu
You can use Windows personalization settings to add a custom color theme to the Windows 11/10 Start Menu. Below are a few methods:
- Using Personalization Settings
- Using Control Panel
1] Using Personalization Settings
Windows 11
Right-click the Windows button on the Taskbar and from the list of options displayed, select Settings. Alternatively, you can press Win+ I in combination to go open the Settings directly.
When the Settings screen opens, choose the Personalization heading from the side panel on the left.

On the right, look for the Color tab. When found, hit the side-arrow button to expand its menu.

Here’ scroll down to Accent color heading, click the drop-down button and choose the Manual option. Now, select the color of your choice from the Windows colors option.
Windows 10
You can use Windows personalization settings to alter the color of your Start Menu by following the below steps:
- Go to Settings.
- Now hit Personalization
- From the left pane select the Colors option.
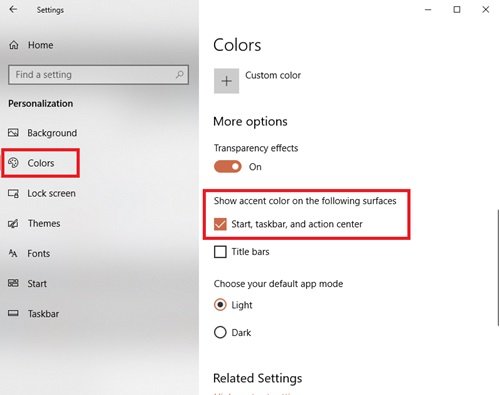
- Scroll down to the ‘Show accent color on the following surfaces’ section
- Check the Start, taskbar, and action center option.
Your Start Menu, taskbar, and action center will now start picking the accent color instead of the default color.
This option is great for those who frequently change their desktop backgrounds or have a slideshow for their desktop background. By allowing Windows to select accent color, you can ensure that your Start Menu is always mix-matching with your background.
To add a custom color theme to Start Menu follow the next steps.
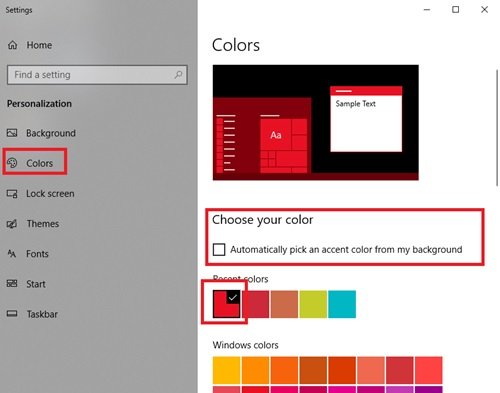
In the same Settings > Personalization > Colors window, uncheck the Automatically pick an accent color from my background option and select the color of your choice from the Windows colors option.

Done! This will add a custom color theme to Start Menu.
2] Using the Control Panel
- Go to Settings
- Now click Personalization, and from the left pane select the Colors option.
- Scroll down to the ‘Show accent color on the following surfaces’ section and check the Start, taskbar, and action center option.
- Now, press Win + R key to open the Run dialog.
Now type the following command in the dialog box and press the Enter key:
shell:::{ED834ED6-4B5A-4bfe-8F11-A626DCB6A921} -Microsoft.Personalization\pageColorization
This command will open the Color and Appearance window.
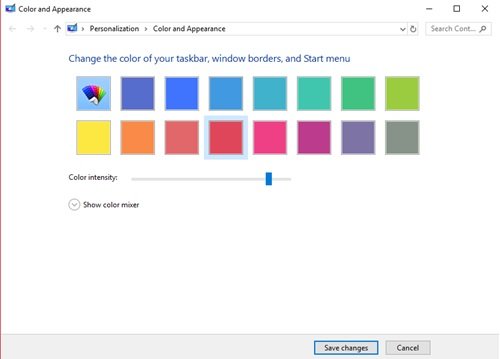
Select the color of your choice and click Save Changes.
If you do not like the default colors available, try creating your own by using the color mixer below. To create custom colors, drag the hue, saturation, and brightness sliders to the desired location; this will create your perfect shade.
Another quick way to add custom colors to your Start Menu is to install a new theme. Microsoft offers plenty of themes on their website, each one uses specific colors that apply to the Start Menu as well. Do try them out!
What is an accent color?
An accent color is essentially a shade used in comparatively small quantities in space. The primary objective behind using it is to add impact and interest. When added in small areas or corners of the screen, these colors can be complementary or add contrast to the main tone of the screen color.
Why can’t I show accent color on Taskbar?
Unless you have the appearance set to dark mode, you can’t set accent colors on the Start menu and taskbar in Windows. That’s because when you have the light mode enabled and visit the Colors section under the Settings, you’ll see the Start, Taskbar, all grayed out. So, to fix it, you’ll need to switch to dark mode first.