
Capturing screenshots is a handy way to document and share information you want to make visible to others. By default, Windows OS features multiple options for taking high-resolution screenshots. These include keyboard shortcuts, Snipping Tool, etc. Having said that, you may have noticed that, after capturing an image/screen from your Windows 11/10 computer, its overall quality sometimes appears low. This occurs due to low resolution.
To capture high-resolution screenshots in Windows 11/10, follow these steps to enhance the clarity of your next screenshot. The term resolution refers to the number of pixels (or dots per inch – DPI) per inch of the image. So, a higher resolution means improved quality.
Take High-Resolution screenshots in Windows 11/10
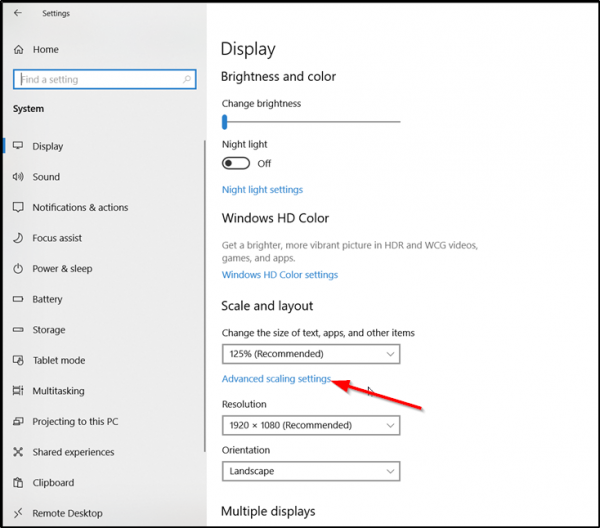
In Windows 10, go to ‘Settings’, choose ‘System’ and then select ‘Display’.
Next, under ‘Screen and Layout’ section, click on ‘Advanced scaling settings’.
Now, turn the slider below ‘Let Windows try to fix apps, so they are not blurry’ from ‘off’ to ‘on’. Doing so will make apps on your main display look better.
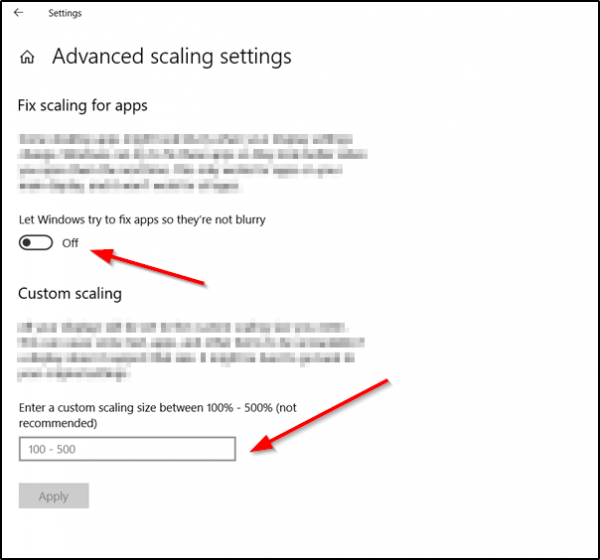
Alternatively, you can enter a custom scaling size between 100-500. Following this, displays will be set to the custom scaling size you enter.
When done, hit the ‘Apply’ button to allow the changes to take effect.
In Windows 11, you will see the settings here:
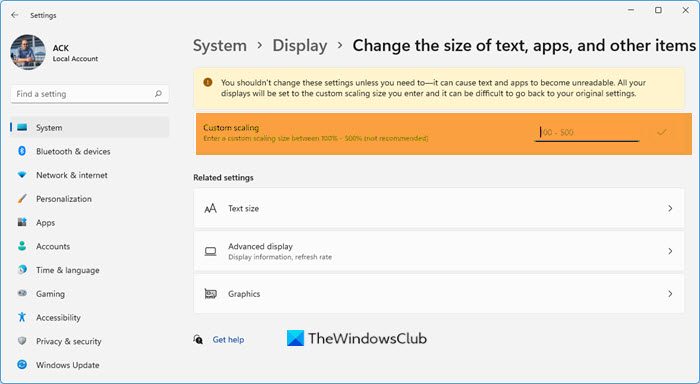
Open Settings > System > Display > Custom scaling.
The above option has one shortfall – it can cause some texts, apps, and items to be unreadable if the display doesn’t support that size. Additionally, it may be challenging to revert to the original settings.
Tips for Maximum Resolution
- Use a high-resolution display: The screenshot resolution matches your screen’s resolution.
- Scale settings: Go to Settings > System > Display and set Scale to 100% for pixel-perfect captures.
- Save as PNG: Avoid JPG for screenshots unless file size is a concern.
Read: How to Check and Change Image DPI in Windows.
Take High-Resolution screenshots using GIMP
If you use GIMP, a free photo editing software, you can improve the quality of screenshots.
Launch GIMP. If GIMP is not installed on your PC, download it from gimp.org.
Next, select ‘File’ and choose ‘Open’. Once done, highlight the screenshot of whose quality you would like to improve.
After that, select ‘Open’, choose the “Image” menu and check the box marked against ‘Scale Image’ option.
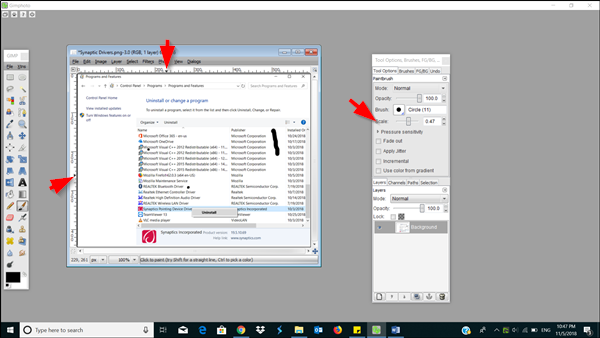
Now, find the resolution fields and change,
- X resolution
- Y resolution
When done, choose ‘Scale’ > ‘File’ and ‘Save’.
Save the changes when done.
High or enhanced resolution can make a significant difference in the image quality of a screenshot.
Hope you like this tip!
PS: Gimphoto and GIMPshop come with GIMP reloaded with some useful plugins and resources. You may use one of these too.
How do I take high quality screenshots on Windows 11?
To capture high-quality screenshots on Windows 11, follow the steps above. However, if you are already set, you can use the Print Screen button to complete the task. On the other hand, it is possible to capture HD screenshots using third-party apps and built-in utilities as well. For example, you can use the Snipping Tool to capture a screenshot.
How do I make my screenshots higher resolution?
Regardless of which monitor you use, the size of the screenshot will always match the monitor’s resolution. However, if you want to display everything in a larger size, you can adjust the scaling level to 125% or 150%. It is possible to tweak the scaling level using Windows Settings.
