802.11 is a set of IEEE standards that control wireless networking transmission methods. They are used today in the following version to offer wireless connectivity in different environments (home/business).
- 802.11a
- 802.11b
- 802.11g
- 802.11n
The latest version i.e. 802.11n, is a wireless networking standard that uses multiple antennas to increase data rates. The performance of this version is influenced by network setup, interference from other nearby networks, frequency (2.4GHz or 5GHz) and more. If you find it disabled for some reason, here are the steps you can follow to review the recommended settings for 802.11n connectivity and enable it in Windows 10/8, if needed.
How to install 802.11n driver in Windows 11/10
To enable 802.11n Mode Wireless Connection for Windows 11/10, do the following:
- Open Control Panel
- Choose Open Network and Sharing Center
- Click Change Adapter Settings
- Right-click the Wi-Fi adapter and select Properties
- From Properties page, select Configure
- Switch to Advanced Tab and search for the 802.11n Mode under the Property
- Change its Value to Enabled.
Read on to get a detailed perspective.
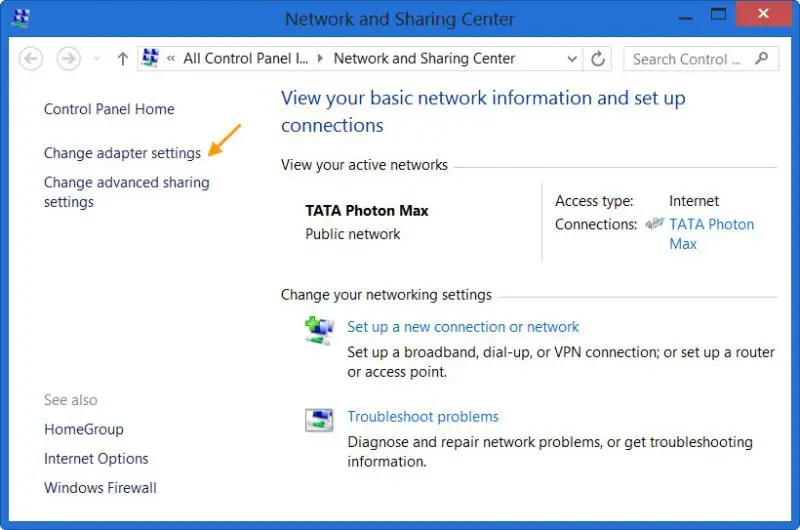
From the Start search, search for and open Control Panel. Then choose Network and Sharing Center applet.
Next, click ‘Change Adapter Settings’ link.
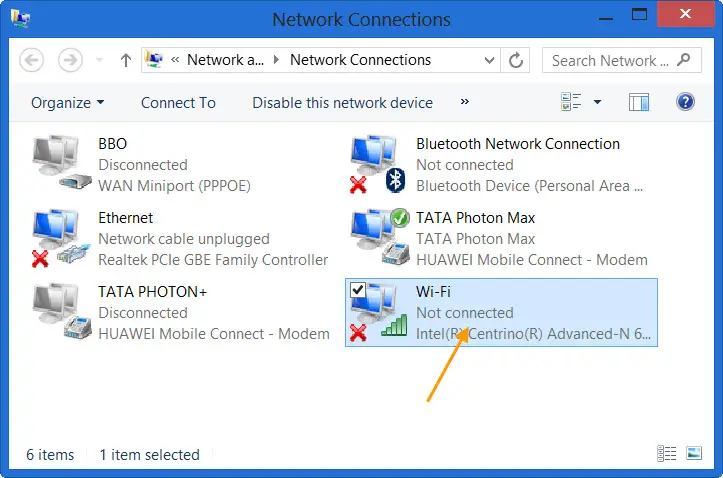
Then, right-click the Wi-Fi adapter and select the ‘Properties’ button.
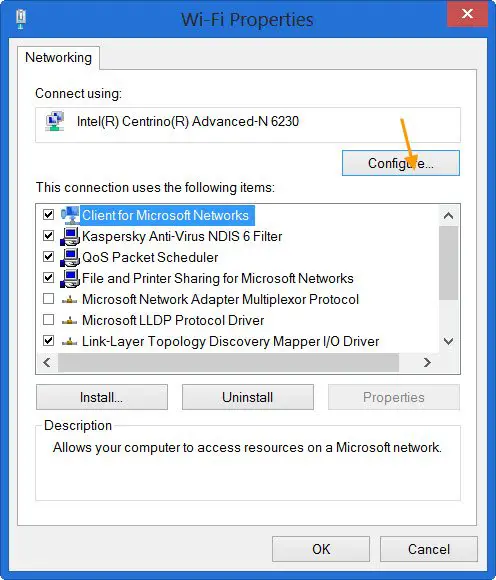
This will open the Properties box. From the ‘Properties’ page that shows up on your screen, select ‘Configure’ option.
Switch to ‘Advanced Tab’ and search for the 802.11n Mode under the Property, select it and change its Value to “Enabled“.
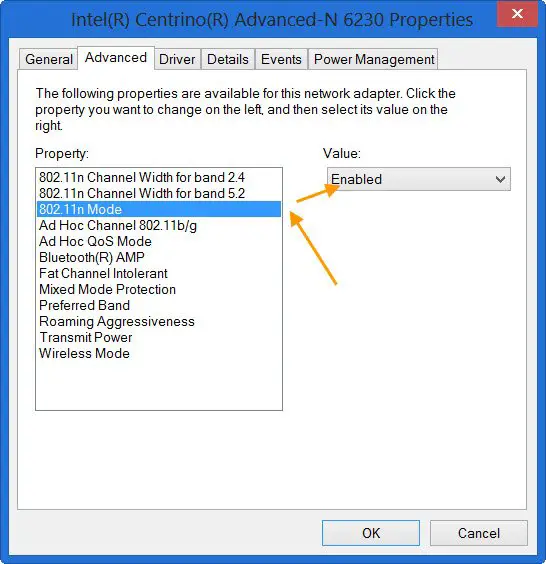
If for some reason, the 802.11n version doesn’t show there, update your driver and firmware.
When it’s done, hit the ‘OK’ button to apply the final changes.
As the last step, establish a re-connection with the WiFi router.
