Unless you configure your Edge browser to do otherwise, it will keep a detailed record of all Internet browsing activity. For example, the websites you frequently visit or go to quite often. It does this to enable the webpages to load faster. However, in the process, it consumes a lot of space. So, if you are wary of the activity, simply limit Microsoft Edge Cache Size in Windows 11/10.
Increase or Decrease Browser Cache Size in Edge
Some users have reported that upon launching Edge with only a couple of tabs open, it consumed a very high amount of RAM. If you face such an issue, follow the instructions given below to change the Microsoft Edge Cache Size.
- Right-click the Edge icon on Taskbar and choose Properties.
- Switch to the Shortcuts tab of Edge Properties Window.
- In the target field, append the following text to the entry provided -disk-cache-size-<size in bytes>.
- Click Apply Button.
- Restart the Edge browser.
Now, let us cover the steps in a bit of detail.
Right-click the Microsoft Edge icon on the taskbar and from the list of options displayed, select ‘Properties’.

The Microsoft Edge Properties window will open. Switch to the tab labeled as ‘Shortcuts’.
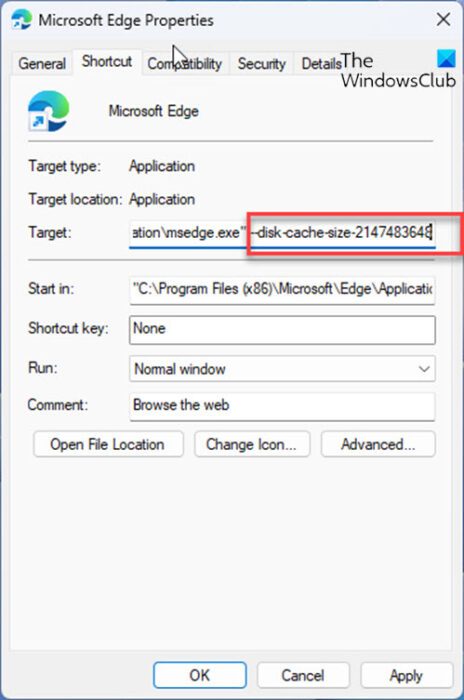
In the Target field of the Microsoft Edge Properties window, add the following text at the end of the address given
--disk-cache-size-<size in bytes>
For example, you can enter it as –disk-cache-size-2147483648.
It should look something like this –
C:\Program Files (x86)\Microsoft\Edge\Application\msedge.exe" --disk-cache-size-2147483648
Note – 2147483648 is the size of the cache in bytes which is equal to 2 Gigabytes. If you would like to reduce this to a bare minimum, enter the desired value.
Click on ‘Apply’ and then click on OK to set the limit.
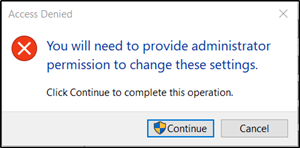
Here, if you are prompted to use the Administrator’s permission to make the changes, ignore the message and click ‘Continue’ to complete the operation.
Alternatively, to change or Microsoft Edge Cache Size in Windows 10, you can remove or disable the Edge extensions that you do not use. For this, simply click the ‘Settings and more’ menu, choose ‘Extensions’ and disable the extensions you no more use.

Click ‘Remove’ to remove the extensions from the browser.
That’s all there is to it!
Related read: How to change Chrome Cache size on Windows 11/10.