Many times while shooting a video, we keep the camera on and continue to record some events that may not be useful. Consequently, we end up with a longish video which includes some unwanted footage or long pauses where no action is taking place. And these things do happen in shooting Home videos. .. and we wish we could remove these unwanted portions present in between.
Edit Videos in Windows Movie Maker
To do all the editing we have the excellent Windows Movie Maker. Actually people just add photos, videos in Windows Movie Maker and create a final movie without editing. This doesn’t look professional and I have come across many users, though they wanted to remove some footage but find it a bit confusing to do. Let us see step-by-step how it’s done.
To edit videos we will make use of ‘Split’ and ‘Trim tool’ options on the ‘Edit’ tab of Windows Live Movie Maker.

Open the video in Windows Movie Maker. Before you start editing, watch the video, and make a note of what you want and what you don’t in terms of time. That is to make note of what all footage you want to be removed. Here in this example I have used a video and noted down as follows:
- 00:00 – 00:38 ———— OK
- 00:38 – 01:45 ———— Remove
- 01:45 – 01:57 ———— OK
- 01:57 – 2:14 ————- Remove
- 02:14 – end ————- OK
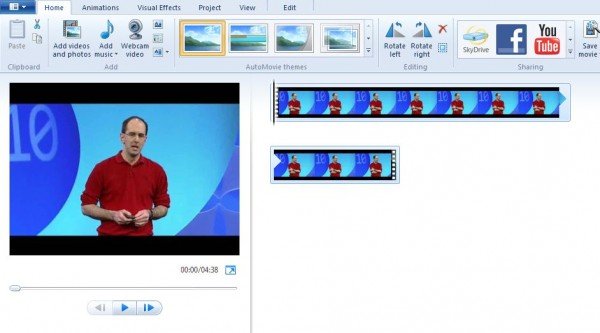
Note that this single video is shown as one continuous icon in the storyboard on the right side. Now from this video, we want to remove those above-mentioned portions. So we want to split this movie into 5 portions.
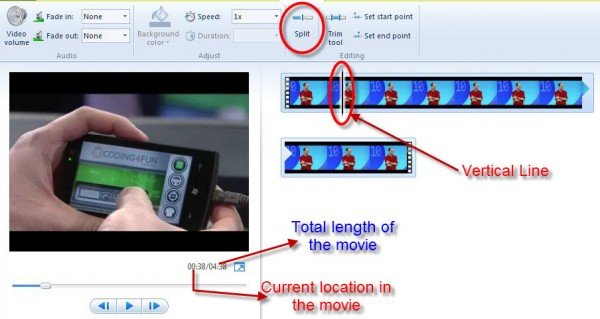
So for splitting the movie, let us begin with the 1st split point, where we want to keep portion from 00:00 – 00:38 sec. For doing this, drag the ‘vertical line’ in the storyboard till the ‘Current location in the Movie’ shows 00:38. The above image will guide you for doing this.
Once the Vertical line is dragged till that 1st split point, click on the ‘Split’ button in the Edit tab to get what’s shown below. Now you see 2 icons in the Storyboard. The first icon is the first 38 sec of the video and the 2nd icon is the rest of the video.

Next, again drag the Vertical line as per the 2nd noted point,
00:38 – 01:45 ———— Remove
So drag the Vertical line till 01:45 and click on the Split button.
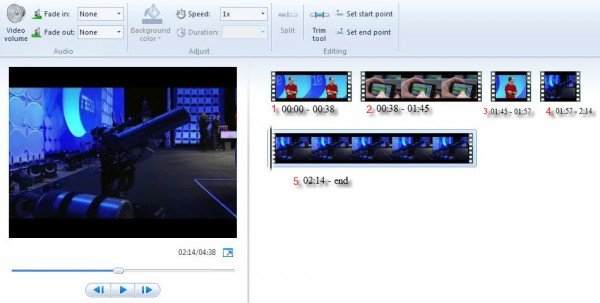
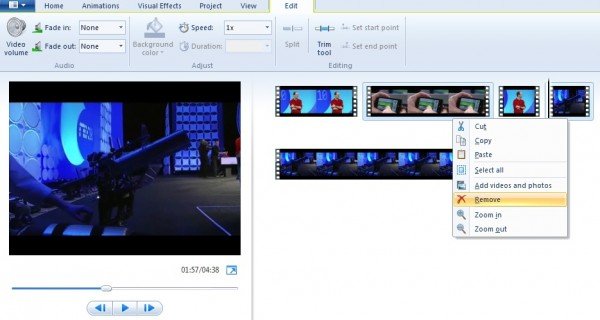
Follow the same procedure for rest, splitting the portion as was noted down. So in the end, we get 5 smaller videos as shown below. I have also added the text with timings against each portion just to make it more clear.
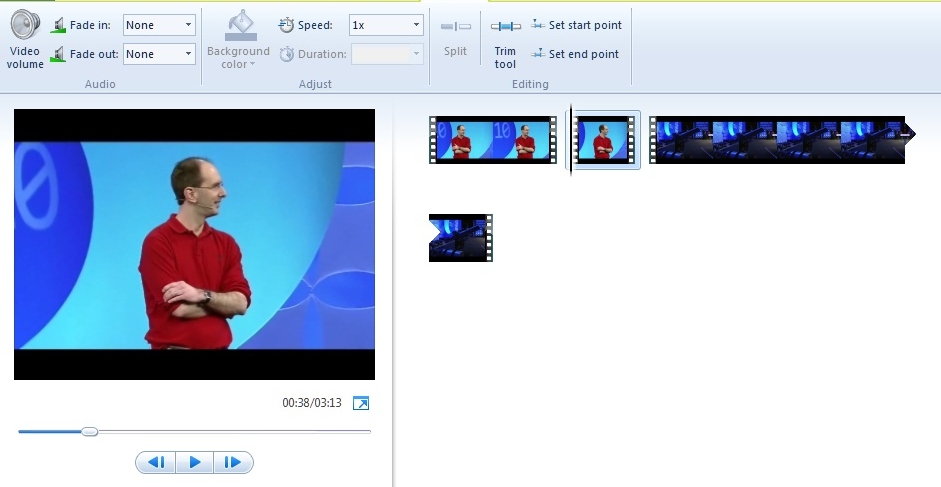
Once it is done, we want to remove the video clipping 2 and 4 as was required. So click on the 2nd video to select it, now keeping the Ctrl button pressed, also click on the 4th video to select it. Now both are selected. Now right-click on any of the selected videos and click the Remove option.
After removing the unwanted video portions, we now have :

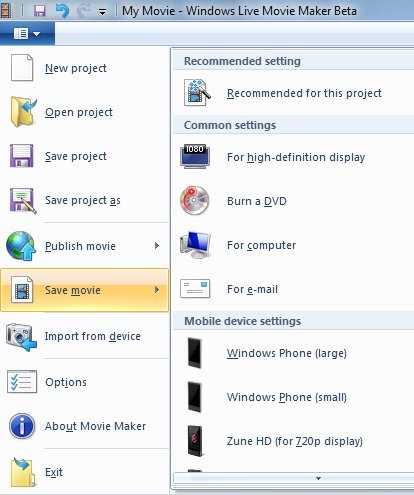
The video can be previewed by clicking on the ‘Play’ button in the Preview pane on the left side. Now, if everything is fine and you are getting what you wanted then you can save it in any format you want.
Before saving, if you still find some portions to be removed from start or end then you can make use of ‘Trim tool’.
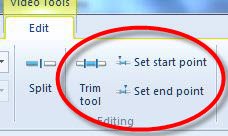
Select the video which you want to trim, drag the Vertical bar to the time you want to set the new start point and click on the ‘Trim tool’ –
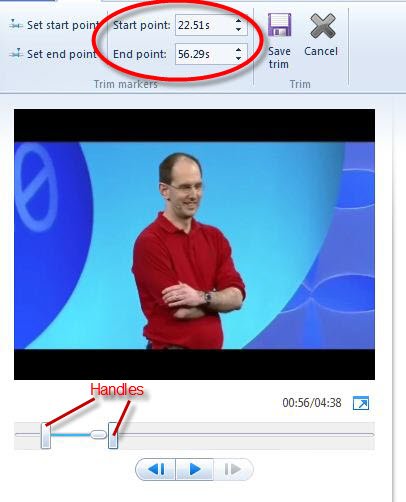
In the preview pane, you can see the play bar which has that has a handle on each end. If you drag the left handle, it’ll move the start point of the video farther. And dragging the right handle will clip the end of the video. So you can move either one or both handles as per your requirement. And after that, if you ‘Save trim’, you’ll get the video between those handles, trimming the start or end or both as you had done. The start and endpoint can also be adjusted by changing the values in the Start and End Point boxes, it’s kind of fine-tuning. Either use the Up/Down arrows provided or enter your own values.
Please note the values has to be in seconds, so convert those minutes into seconds. Once you have set, you can preview the trimmed video by clicking the Play button.
After you have set new Start/Endpoints, do not forget to click on ‘Save Trim’ else click on cancel to start again. Once you have saved, you’ll again be returned to the main Storyboard. So save the movie in the required format.
So we have seen how to remove the unwanted footages in between the video by using the ‘Split’ option by splitting the video into smaller videos. And using the ‘trim’ option to trim the Start or End of the video. I hope this Step-by-Step guide will help you to prepare good videos.
Some Points to note:
- As you split the video into many smaller videos, you can rearrange the videos by just dragging them in any order you want if required in the Storyboard.
- In the Preview pane, apart from the Play/pause button, you also have Previous and Next frame buttons. These can be used to snip a video to a Single frame as pressing them moves the video by a frame.
- Also, keep an eye on the total time of the video to get an idea as you use the Trim option, your total length of video will be reduced once trimmed.
- You can also make use of slider provided at the bottom right of Windows Live Movie Maker for zooming the time scale in the Storyboard. Also, you can change the thumbnail size of the icon in the Storyboard if required.
Your Editing process will improve as you practice. Once you understand it, it’ll be a very easy job that can be done very quickly in Windows Live Movie Maker. Apart from these options, explore various other options like transitions (there are lots of transitions provided), adding text, titles, audio, etc.
So Enjoy shooting a Home Video and edit it to make it look like the professional video very easily, in Windows Live Movie Maker.