We always prefer backing up our important data – and for that, we have many free backup software available. But have you ever backed up your WiFi or Wireless Network Profile? Today we will show you how to Backup and Restore your Wireless Network Profiles in Windows. Windows OS has an in-built feature that lets you do so very easily. To get started, you would need to have a USB storage device ready; it can be anything such as a USB Pen drive or any other Mass Storage device.
Backup WiFi Network Profiles in Windows 11/10
To export or backup WiFi Network Profiles, you can make use of the built-in netsh command-line tool.
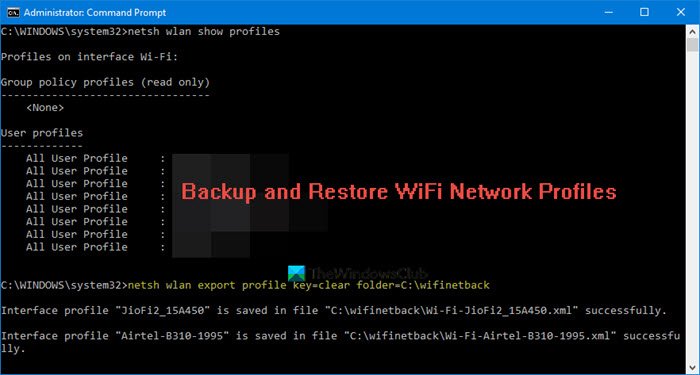
To list all your WiFi network profiles, open an elevated command prompt, type the following and hit Enter:
netsh wlan show profiles
To back up or export all your WiFi network profiles, use the following command:
netsh wlan export profile key=clear folder=C:\wifinetback
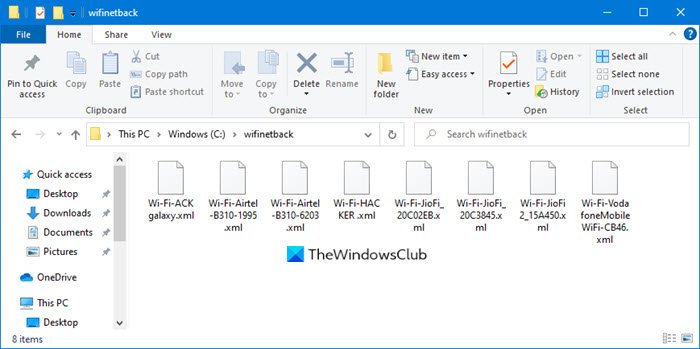
You have to first create a folder wifinetback on the C drive, All the profiles will get backed up here as an XML file.
To back up or export only a single WiFi profile, use the following command:
netsh wlan export profile "profile_name" key=clear folder=c:\wifinetback
Restore WiFi Network Profiles in Windows 11/10
To restore or import the WiFi profiles, for all users use this:
netsh wlan add profile filename="c:\wifinetback\profile-name.xml" user=all
Here replace the actual file name of the backed up XML file.
That’s it.
Windows 7 users can use the Control Panel
Open Control Panel\All Control Panel Items\Network and Sharing Center. In the left side, you will be able to see an option “Manage Wireless Networks”. Click on the option to proceed.

Double click the connection you want to back up. Now you can see another window, displaying the details about the network.

Click on the option that says: “Copy this network profile to a USB flash Drive.”
A new wizard will start. You simply need to follow the on-screen instructions and click on the Next button – but make sure that the USB drive displayed is correct.

When the task is finished, click on Close.
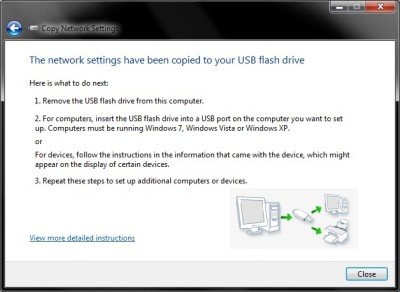
Do note that any other previously taken backups of wireless network profiles would be deleted on the USB drive. If you want to have those backups also, copy the backup files from the root folder of the Drive to any other Folder.
Now you have successfully backed up your Wireless Network Profile.
Now let’s see how to restore the Wireless Network Profile.
Plugin your USB drive into the computer that you want to restore the Wireless Network Profile.
In the autorun menu click on the option that says: “Connect to a Wireless Network”. That’s all! You would be connected to your Wireless Network very quickly and the Network Profile would be restored to that PC.
If the autorun has been disabled on that PC, you can follow these steps:
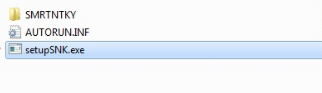
Step 1: Open the USB flash drive with Windows Explorer.
Step 2: There will be a setup file called setupSNK.exe in the root folder of USB drive. Open that setup file and you will be prompted by a message box. Click on “Yes” and you are done! You’ve now successfully restored your backup.
Hope you liked the tip!
Now Read: Delete, remove or forget Wireless Network Profiles in Windows 11/10.